
 Contact us


Aluminium Waler Frame System Installation Guide
How to assemble, install and remove an Aluminium Waler Frame System, the light alloy frame we hire to brace trench sheets around an excavation.
You build the struts to length, bolt them between two rails on timber bearers and pump the frame out to size. With the Dig & Push method, you lift the frames into a shallow pit, push sheets around the perimeter, then dig and push in turn, using a temporary frame to restrain the bottom of the sheets, until you reach the final formation level. Removal is the reverse of this procedure. The sheets can also be pre-driven, and the guide covers excavations with three or more frame levels.
If you'd like a printable copy, download the Aluminium Waler User Guide (PDF). For full specifications, see the Aluminium Waler Frame Systems product page.
Equipment Details
| Length | Permissible Load | Min. Width | Max. Width | Frame Weight |
|---|---|---|---|---|
| 1.50m | 80.0kN/m | 0.50m | 2.00m | 77kg |
| 2.00m | 56.0kN/m | 0.50m | 2.00m | 88kg |
| 2.50m | 48.0kN/m | 0.50m | 2.00m | 99kg |
| 3.00m | 30.0kN/m | 0.50m | 1.80m | 110kg |
| 3.50m | 36.0kN/m | 0.50m | 1.80m | 143kg |
| 4.00m | 30.5kN/m | 0.50m | 1.80m | 154kg |
| 5.00m | 23.0kN/m | 0.50m | 1.80m | 168kg |
Installation Sequence - Dig & Push
1. Assemble the struts
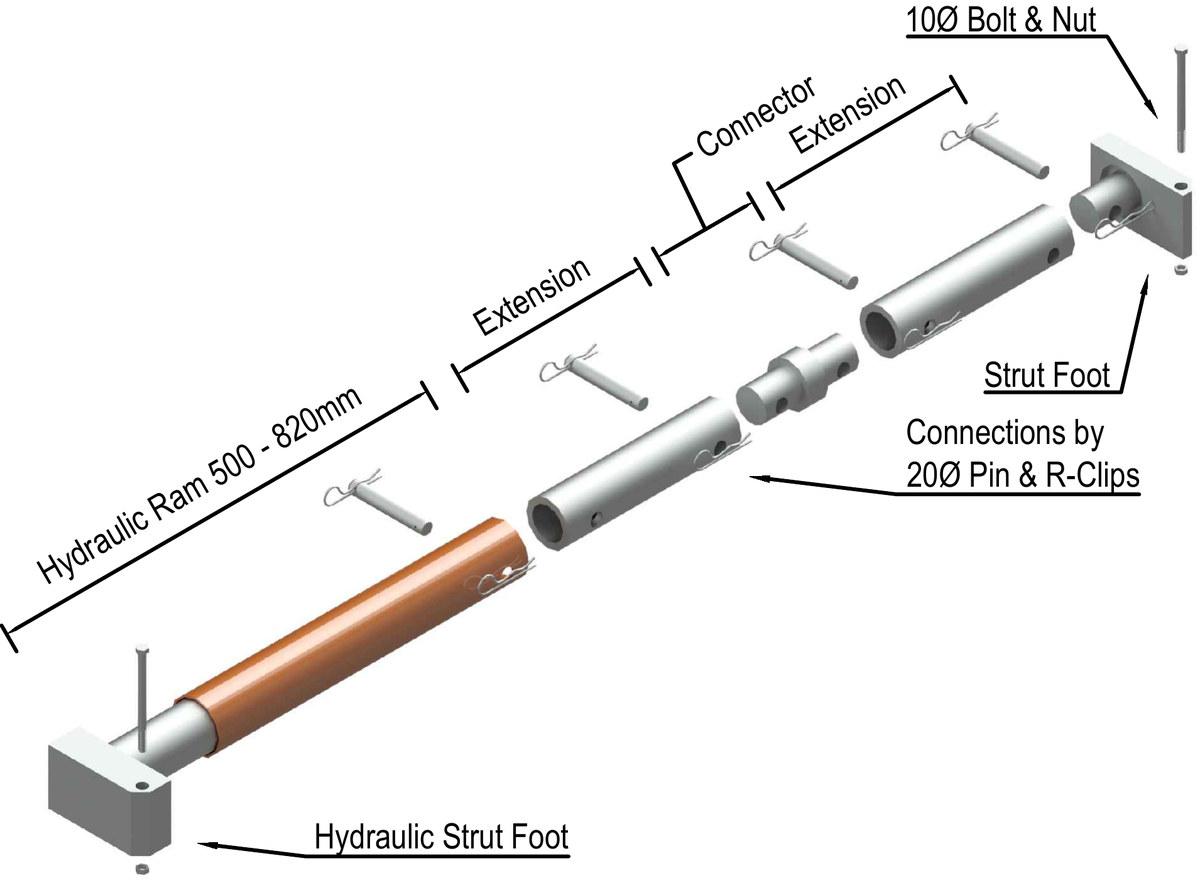
Assemble Waler struts to the required length by adding extension units on to the Hydraulic Ram as required.
2. Assemble the frame
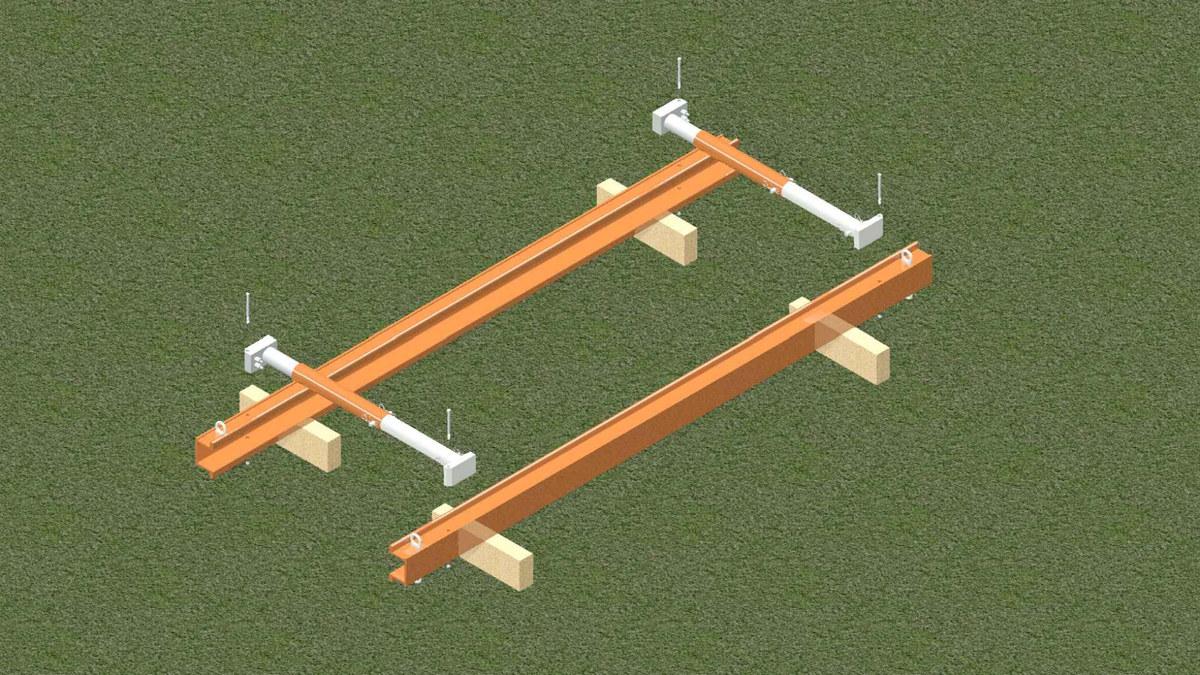
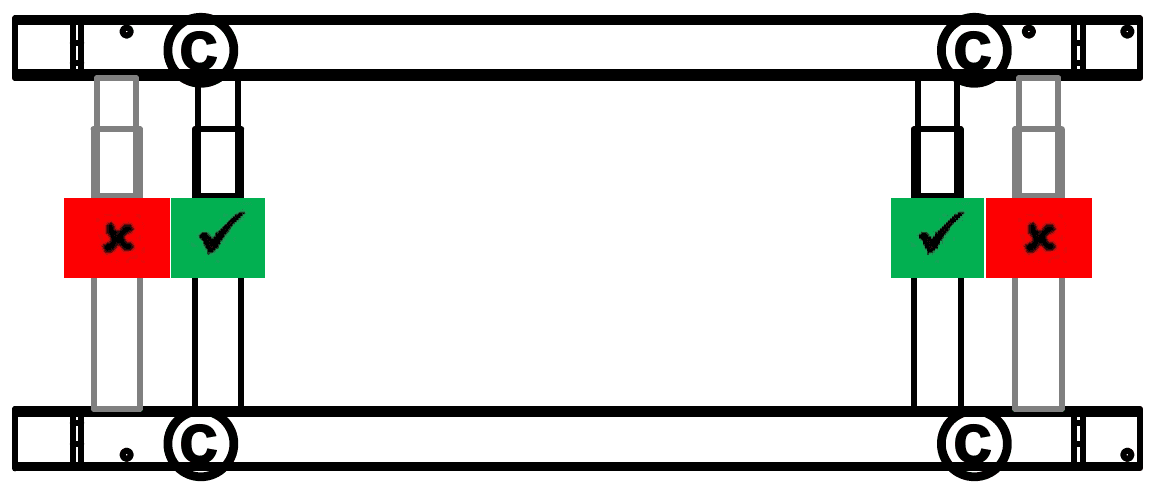
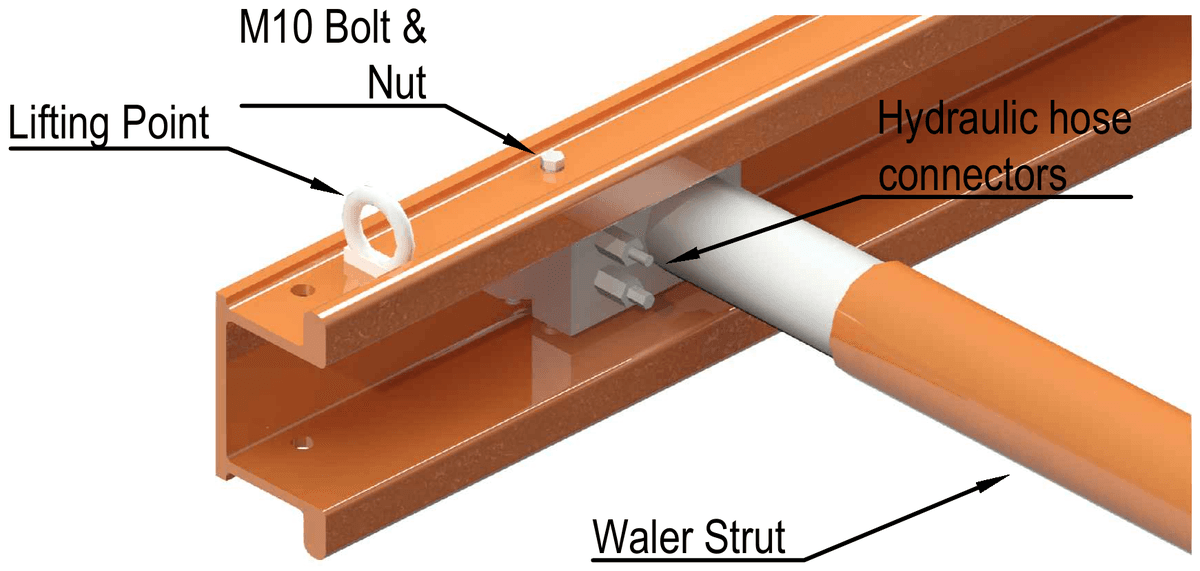
Lay two Aluminium Waler rails down on level ground on suitable timber bearers. Install the two Waler struts and connect to the rails using M10 Bolts (), noting the correct orientation (see below).
If preferred, the struts can be assembled within the excavation at the level specified in the Temporary Works Design. Follow steps 1-3 within the excavation.
3. Pump out the frame
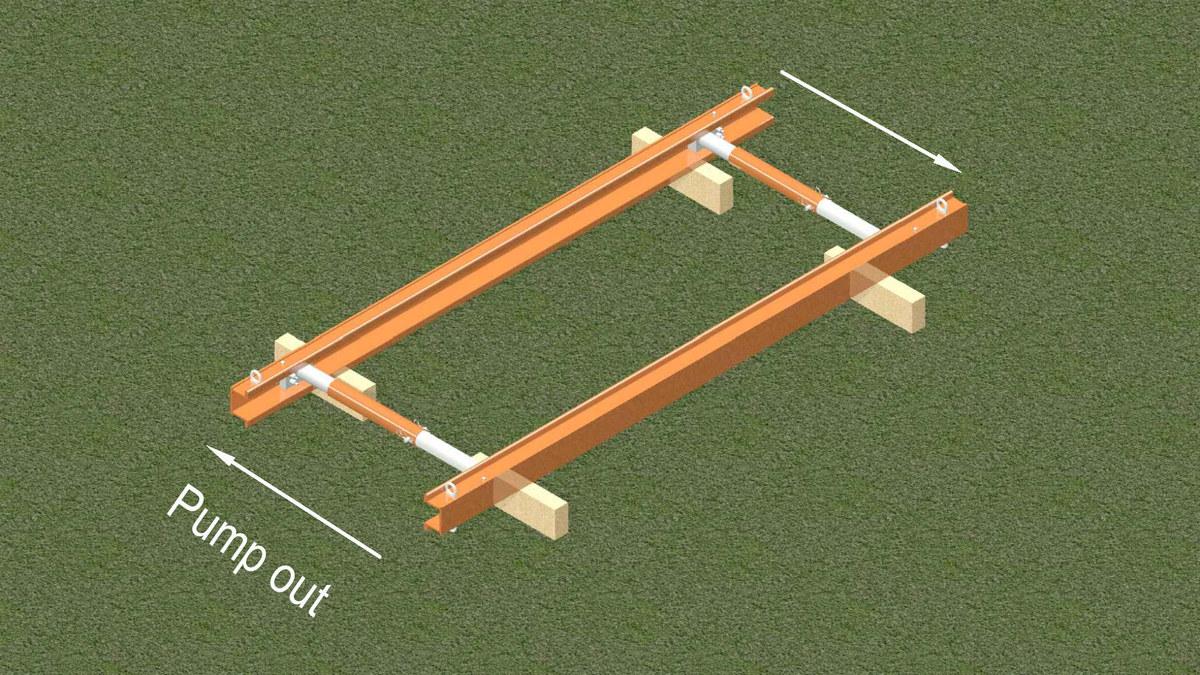
Pump out the Hydraulic Rams to the required size. Ensure that the pump is 3/4 full of shoring fluid. Attach the single hose to the female connector of the pump, then attach the other end to the male connector on the Hydraulic Ram. Open the lock-off valves and pump out the frames to the required size. Close the lock-off valves to maintain pressure.
Connect lifting hooks through the lifting points ().
4. Lift the frames into the pit
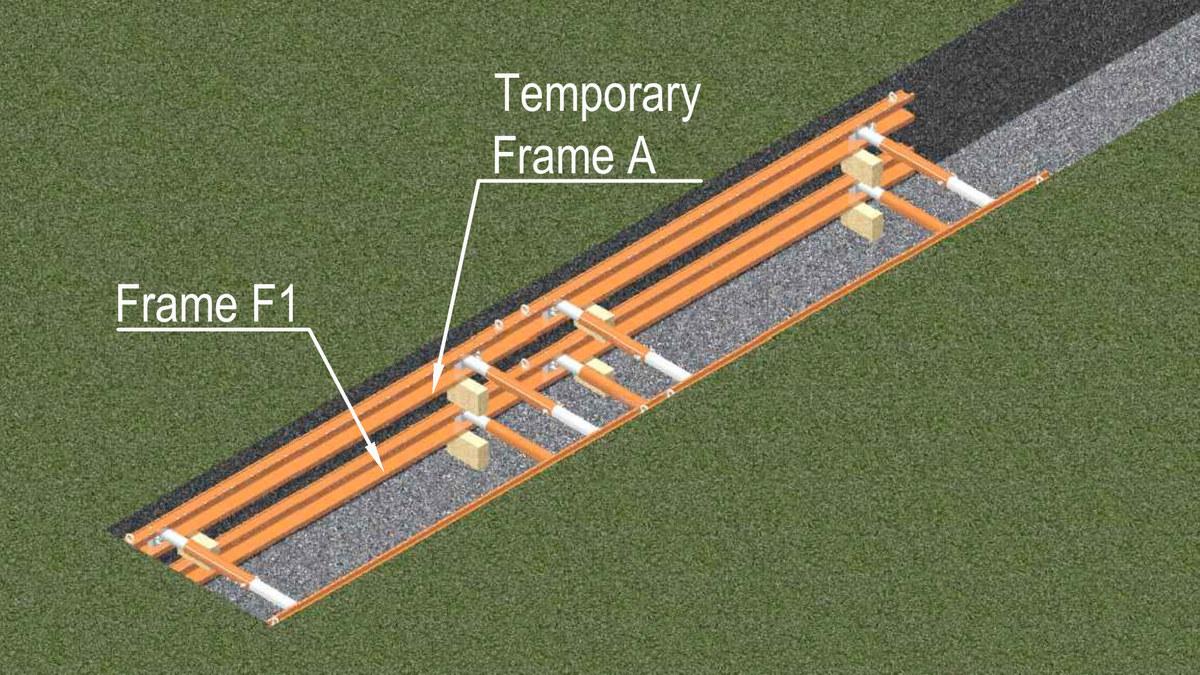
The following steps describe the 'Dig & Push' installation method for an excavation with 2no. frame levels (F1 & F2, upper and lower frames). Alternative installation methods are shown below.
Check for services and then excavate to the underside of Frame F1 (upper), using a stepped or battered edge if required. Using correctly rated lifting chains, lift two frame levels into the shallow pit and lay on timber bearers.
5. Push the sheets
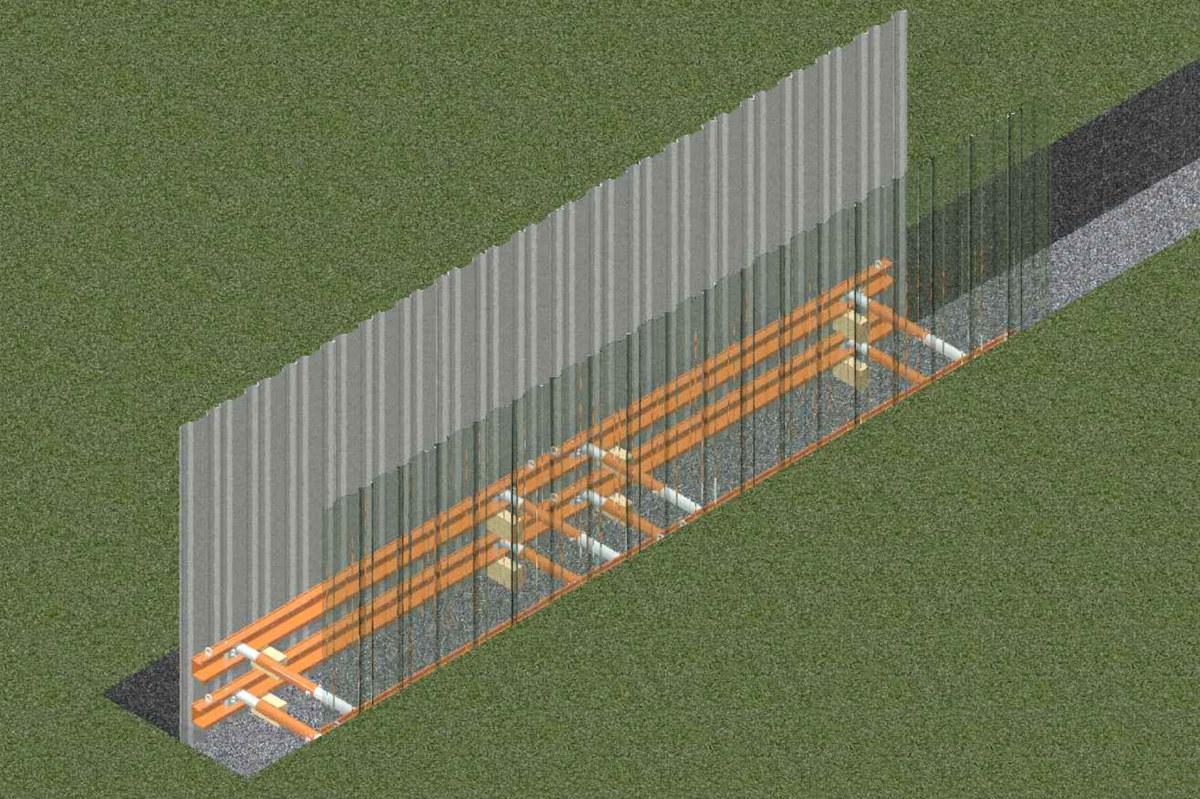
Using the correct Driving Cap for the sheet type, push sheets around the perimeter of the excavation until refusal, or about half the required dig depth. The Waler Rails can act as a guide. Ensure that the restraint chains are hooked onto the sheet piles.
Temporary use of shorter sheets can be used to provide a digging window if required.
6. Install Temporary Frame B
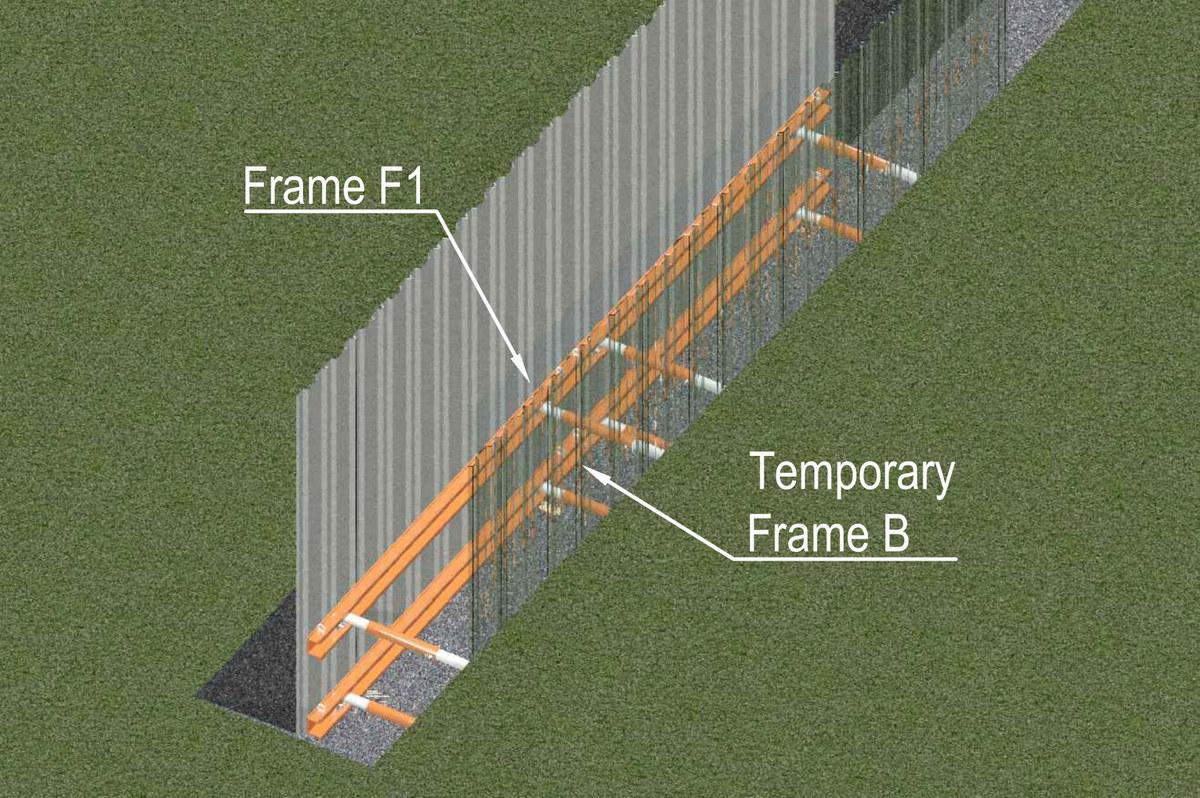
Excavate to the midpoint between the upper and lower (F1 & F2) frames' final levels. Install the 'dummy' Temporary Frame B to restrain the bottom of the sheets. The frame can be installed partially retracted and then pumped out to the required size in the excavation. If this is not possible, the frame can be assembled within the trench.
Remove the Temporary Frame A (Stage 4).
7. Install Frame F2
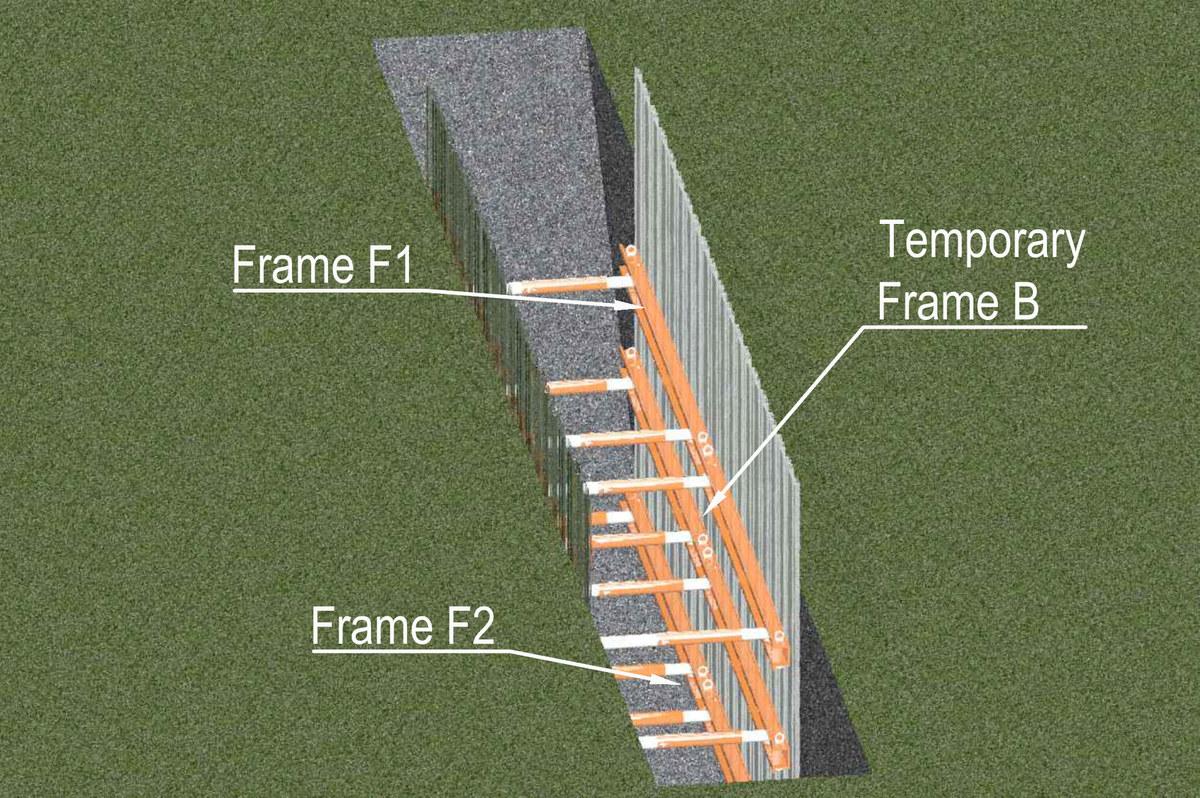
Progress the excavation to the underside of Frame F2's final level by digging and pushing the sheets incrementally.
Install the lower Frame F2 and attach restraint chains.
Temporary Frame B can now be removed.
Continue 'digging & pushing' the sheets until the final formation level is reached, installing additional frame levels where required.
8. Push the sheets to final level
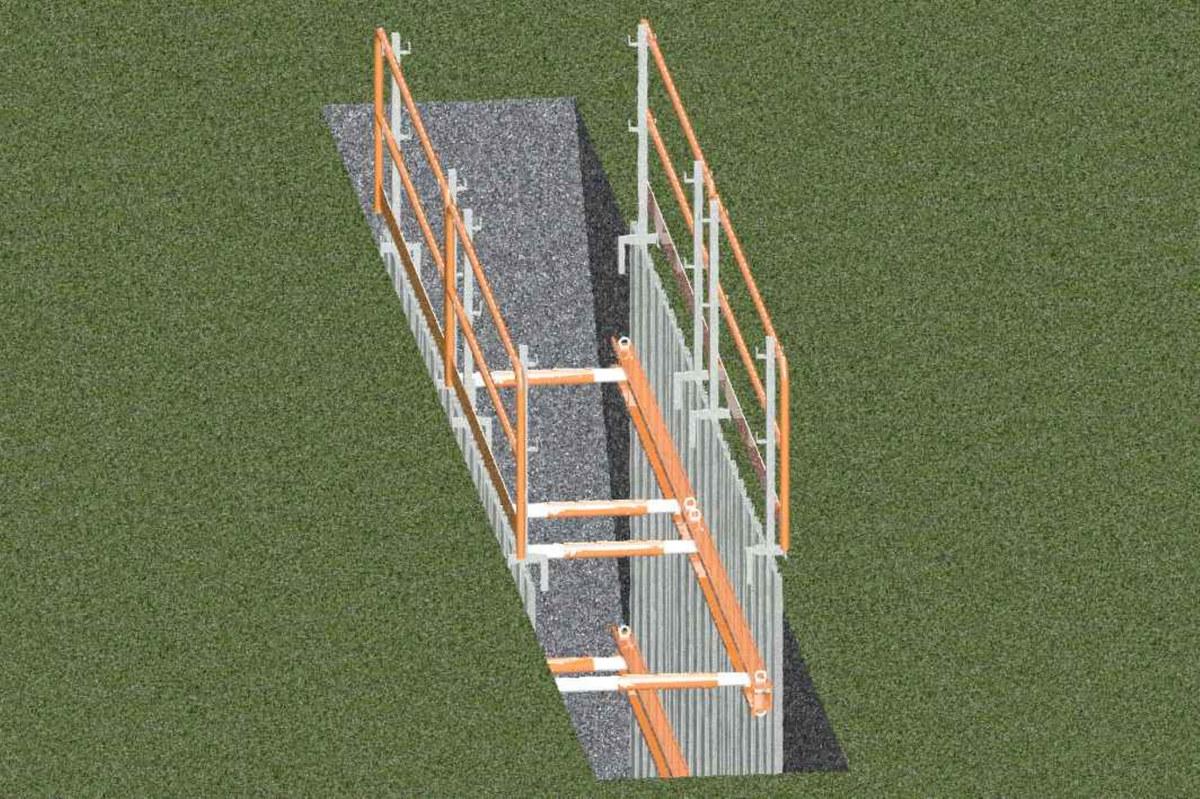
Ensure that all the sheets are pushed to their final levels. This is usually the formation level unless a toe-in is specified in the Temporary Works Design.
Install a suitable access and edge protection system.
The removal of the equipment is the reverse of this procedure, reinstalling the temporary frame levels where required as backfilling progresses.
Alternative Installation Methods
Alternative Installation: Pre-driving
- Pre-drive all sheets to the final toe level as identified in the Temporary Works Design using suitable plant.
- Excavate to the underside of the upper Frame F1.
- Install Frame F1 to the level specified in the TWD.
- Excavate to the underside of the lower Frame F2.
- Install Frame F2 to the level specified in the TWD.
- Excavate to formation level.
- Install permanent works, then the excavation must be backfilled to the underside of each frame prior to its removal.
Dig & Push Installation with three or more frame levels
In situations where three or more frames are required, Stage 7 (Installing Frame F2) is repeated with further temporary frame levels installed to ensure the bottom of the sheets is always secured.
Excessive sheet cantilever below the lowest frame must be avoided.
Please ensure all struts are fully retracted prior to collection.
Waler Strut Arrangement
Ensure that the Waler struts are arranged facing inwards.
For two strut arrangements (up to 3m waler), the strut centres should be:
Strut centres = Rail length - 0.72m.
For three strut arrangements, place the third strut centrally.
Detail A - Strut Connection
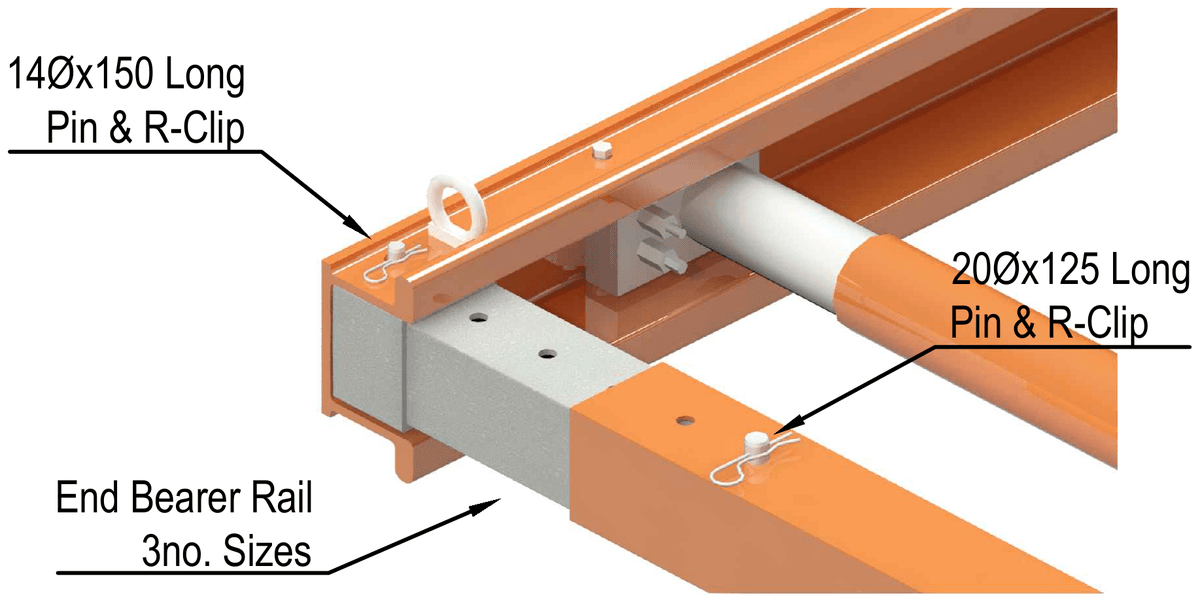
Detail B - End Bearers
Residual Risks
The following residual risks must be addressed in the Contractor's RAMS:
- Locate all potential services prior to excavation in accordance with NRSWA Regulations.
- The excavation may be classified as a confined space. The Contractor must assess this risk and provide suitable gas detection and rescue equipment where appropriate.
- The Contractor should always adequately consider the surrounding environment and account for adjacent structures, slopes, roads etc.
- Additional or independent edge protection may be required during the installation.
Do's and Don'ts
- Ensure an adequate Lift Plan is incorporated into the method statement (by Contractor) and pay close attention to the weights of the Waler Frames (shown in table above).
- Carefully inspect all components and hydraulics prior to use. Contact SEL for advice where damaged components are found.
- Ensure all operatives are Trained & Competent and have been briefed on the requirements of the Temporary Works Design where necessary.
- Install suitable edge protection, access system and Davit system where required.
- Ensure appropriate vertical support is provided to the struts during installation and removal.
- Allow a minimum of 100mm extension on the rams to enable retraction when removing the equipment.
- Don't enter an excavation before adequate shoring is in place.
- Don't use hanging chains for lifting.
- Don't use faulty or damaged equipment.
Edge Protection & Access
Please contact Site Equipment for info on our full range of Access & Edge Protection accessories.